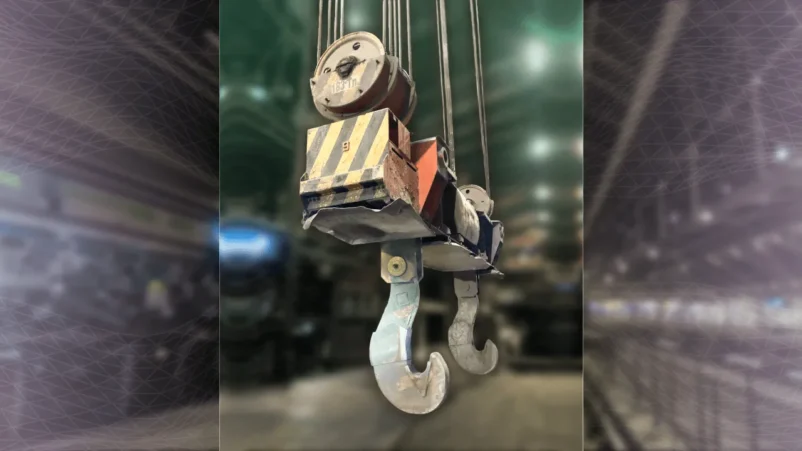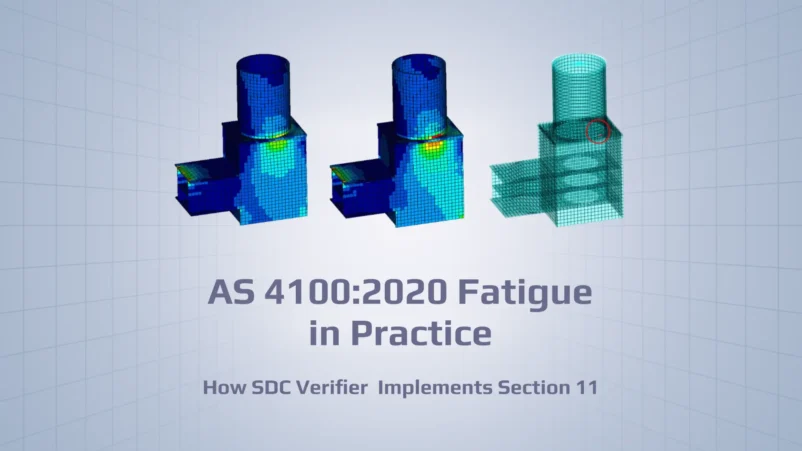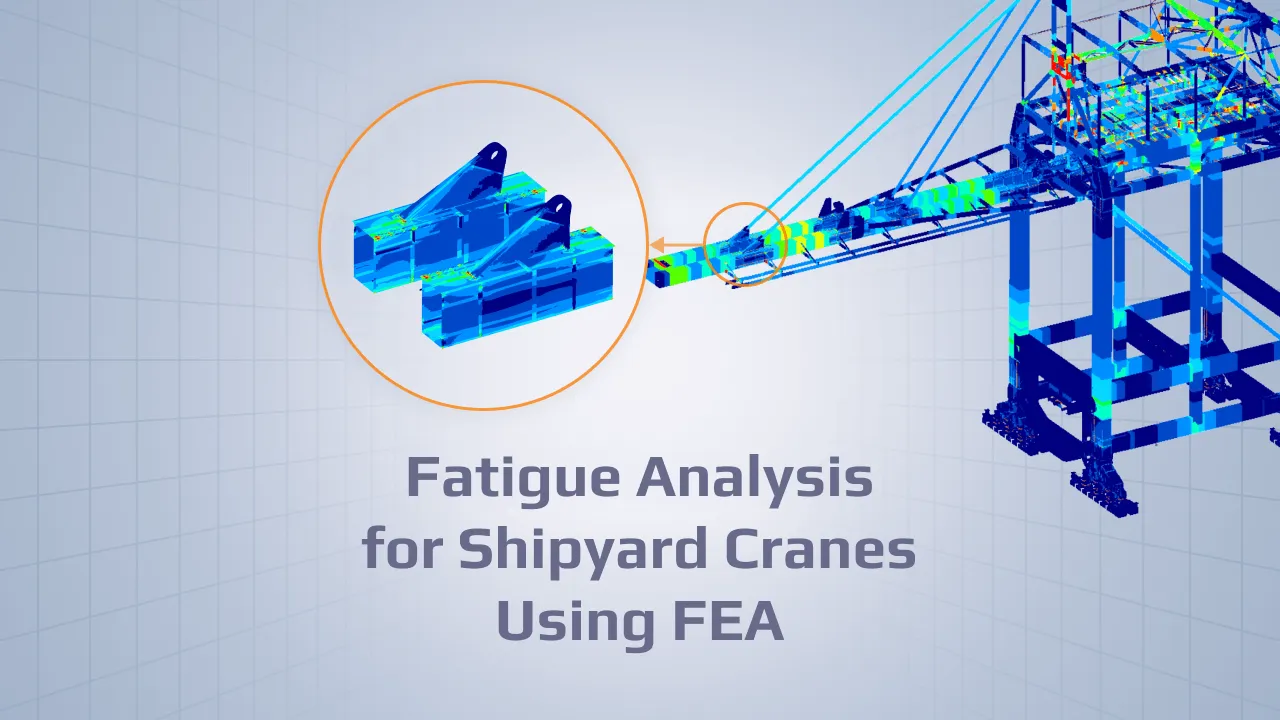
For cranes and other structures with cycling loading, it is very important to make a fatigue check which helps to estimate the fatigue life of the structure. Fatigue strength depends on the following parameters:
- Total number of cycles and the stress spectrum to which the member is subjected;
- The material type used in the member and the notch effect at the considered point;
- The maximum stress (σ_max) which can occur in the member (according to FEM 1.001 is the highest stress in absolute value which occurs in the member in loading case I without the application of the amplitude coefficient.);
- The ratio between the values of the extreme stresses.
Under the influence of the cycling loading, some damages (cracks) can occur in the structure parts at stress values level less than tensile strength and even yield strength of the material.
Note:
In this case, it is very important to determine allowable fatigue stress. Allowable fatigue stress or allowable fatigue strength – is the maximum stress that a material can withstand for a given number of cycles without breaking. The allowable fatigue stress depends on the following factors:
- The material type (elasticity limit of the construction);
- The sign of the σ_max (tensile or compression stress);
- The limit stress ratio k=σ_min/σ_max (τ_min/τ_max), in which σ_min (τ_min) is the minimum stress in the same place as σ_max (τ_max);
- The estimated number of load or stress cycles (taken into account with the crane group);
- The amount of the appearance of stress concentrations caused by connections or constructive notches (taken into account with the notch groups (The notch factor)).
According to FEM 1.001 (3rd, 1998) firstly should be classified the various joints according to their notch effect, and then determine for these various notch effects and for each classification group of the component the allowable fatigue stress as a function of the coefficient k.
The allowable fatigue stresses were determined as a result of tests carried out by the F.E.M. on test pieces having different notch effects and submitted to various loading specter. They were determined on the basis of the stress values which, in the tests, assured 90% survival including a factor of safety of 4/3.
The basis values which have been used to determine the allowable fatigue stresses in tension and compression are those resulting from the application of a constant alternating stress ± σW (κ = – 1) giving a survival rate of 90 % in the tests, to which a factor of safety of 4/3 has been applied. To take account of the number of cycles and of the stress spectrum, the σ_W values have been set for each classification group of the member. For unwelded parts, the values σ_W are identical for steel St 37, and St 44. They are higher for St 52. For welded parts, the σ_W values are identical for the three types of steel.
| Component Group | Unwelded components Construction cases | Welded components Construction cases (Steel St 37 to St 52, Fe 360 to Fe 510) | |||||||||
|---|---|---|---|---|---|---|---|---|---|---|---|
| W0 |
W1 |
W2 | K0 | K1 | K2 | K3 | K4 | ||||
| Fe 360 St 37 St 44 | St 52 Fe 510 | Fe 360 St 37 St 44 | St 52 Fe 510 | Fe 360 St 37 St 44 | St 52 Fe 510 | ||||||
| E1 | 249.1 | 298.0 | 211.7 | 253.3 | 174.4 | 208.6 | (361.9) | (323.1) | (271.4) | 193.9 | 116.3 |
| E2 | 224.4 | 261.7 | 190.7 | 222.4 | 157.1 | 183.2 | (293.8) | 262.3 | 220.3 | 157.4 | 94.4 |
| E3 | 202.2 | 229.8 | 171.8 | 195.3 | 141.5 | 160.8 | 238.4 | 212.9 | 178.8 | 127.7 | 76.6 |
| E4 | 182.1 | 201.8 | 154.8 | 171.5 | 127.5 | 141.2 | 193.5 | 172.8 | 145.1 | 103.7 | 62.2 |
| E5 | 164.1 | 177.2 | 139.5 | 150.6 | 114.9 | 124.0 | 157.1 | 140.3 | 117.8 | 84.2 | 50.5 |
| E6 | 147.8 | 155.6 | 126.7 | 132.3 | 103.5 | 108.9 | 127.5 | 113.8 | 95.6 | 68.3 | 41.0 |
| E7 | 133.2 | 136.6 | 113.2 | 116.2 | 93.2 | 95.7 | 103.5 | 92.4 | 77.6 | 55.4 | 33.3 |
| E8 | 120.0 | 120.0 | 102.0 | 102.0 | 84.0 | 84.0 | 84.0 | 75.0 | 63.0 | 45.0 | 27.0 |
The following equations below give for all values k the allowable fatigue stress values
| k<=0 | |
| For Tension | σt = 5 * σW / (3 – 2 * k) |
| For Compression | σc = 2 * σW / (1 – k) |
| k>0 | |
| For Tension | σt = 5 * σO / [1 – k * (1 – σO/σ+1)] |
| For Compression | σc = 1.2 * σt |
where – σO – tensile stress for k=0 is given by the formula:
σO = 1.66 * σW
σ+1 – tensile stress for k=+1 that is the ultimate tensile strength σR divided be the coefficient of sfaty 4/3
σt is limited in every case to 0.75σR.
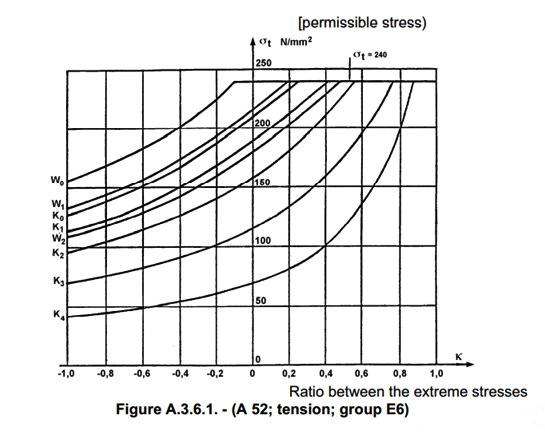
The maximum allowable fatigue stresses have been limited to 240MPa, which is the allowable fatigue stress adopted for checking for ultimate strength. The graph below shows the dependence of the allowable stress for steel from notch effect and ratio between the extreme stresses.
For shear stresses in the material of structural parts for each of the group from E1 to E8 the allowable fatigue shear stress is the formula shown below:
τa = σt of case WO / 30.5
After determining the allowable fatigue stress the following three conditions should be checked:
| σx max < σxa | σy max < σya | τxy max < τxya |
Also, as additional recommended checking the following relationship:
(σx max / σxa)2+(σy max/σya)2-σx max*σy max/(|σxa|*|σya|)+(τxy max/τxya)2 <=1
Classification of a joint in a notch group
The fatigue strength of a member depends upon the quality of the material used and upon the shape and the method of making the joints. The shapes of the parts joined and the means of doing it have the effect of producing stress concentrations (or notch effects) which considerably reduce the fatigue strength of the member.
All joints of construction are divided into categories (according to FEM 1.001):
- Unwelded parts: W0, W1 and W2
- Welded parts: from K0 to K4.
Depending on the weld type, joints with the same loading type will have different notch group. But also notch group for the same welds type can be different depending on loading type. Below shown different types of notch groups for perpendicular loaded joint depending on the weld type.
Non-weld group W0
| Reference | Description | Figure | Symbol |
|---|---|---|---|
| W0 | Parent metal, homogeneous surface. Part without joints or breaks in continuity (solid bars) and without notch effects unless the latter can he calculated. |  |
K0 Slight stress concentration
| Reference | Description | Figure | Symbol |
|---|---|---|---|
| 1.1 | Parts butt-welded (S.Q.) at right angles to direction of forces | 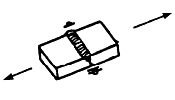 |  |
K1 Moderate stress concentration
| Reference | Description | Figure | Symbol |
|---|---|---|---|
| 2.1 | Parts joined by butt welding (O.Q.) at right angles to the direction of the forces | 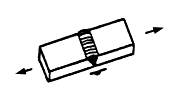 |  |
K2 Medium stress concentration
| Reference | Description | Figure | Symbol |
|---|---|---|---|
| 3.1 | Parts of different thickness butt welded (O.Q.) at right angles to the direction of the forces. Asymmetrical slope : 1 in 3 (or symmetrical slopes : 1 in 2) | 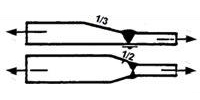 |  |
K3 Severe stress concentration
| Reference | Description | Figure | Symbol |
|---|---|---|---|
| 4.1 | Parts of different thickness connected by butt welds (O.Q.) at right angles to the direction of the forces. 1 in 2 asymmetrical slope, or symmetrical position without blend slope | 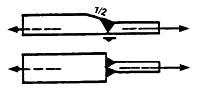 |  |
K4 Very Severe stress concentration
| Reference | Description | Figure | Symbol |
|---|---|---|---|
| 0.1 | Parts of different thickness butt welded (O.Q.) at right angles to the direction of the forces. Asymmetrical position without blend slope | 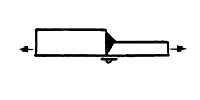 |  |
It is very important to make the right classification of the weld joints to get the accepted value of the allowable fatigue stress. Using SDC Verifier Weld Finder it is possible to recognize all welds in the FEA model and then set the correct joint type to perform fatigue check according to the required standard.
Using SDC Verifier it is possible to perform a standard-based fatigue check of the structure using the following engineering standards:
- Eurocode 3 (EN1993-1-9, 2005)
- EN 13001 (2018)
- FEM 1.001 (3rd, 1998)
- DNV-RP-C203 (2016)
- DIN 15018 (1984)
- FKM Guidelines
Further reading: How to perform fatigue check in the SDC Verifier.
