Nominal Stress and Hot Spot Stress Method for Welds Evaluation in FEA

Weld stresses in welded connections are essential for the strength and safety of steel or aluminum welded structures. There are different approaches to defining weld stresses in FEA. The nominal and hot spot stress methods are the most popular among them. These approaches have some fundamental differences in the accuracy they provide and the work effort they require.
The major difference can be described as that the hot spot stress method incorporates the more competent measure geometrical stress, as opposed to the more limited measure nominal stress. Due to this fact, the hot-spot approach requires fewer detail categories than the nominal stress to provide comparable versatility.
Nominal Stress Method
The nominal stress method is used in FEA to evaluate the stress distribution and assess the structural integrity of welded components. The strength and fatigue performance of welds is primarily analyzed with it.

The nominal stress method simplifies the complex geometry of a weld joint into an equivalent representation, allowing engineers to estimate the stresses around the weld. It’s important to note that the nominal stress method approximates the stress state in a welded joint. More advanced techniques, such as the hot spot stress method or the effective notch method, may be employed to better assess the stress distribution in welds.
Hot Spot Stress Method
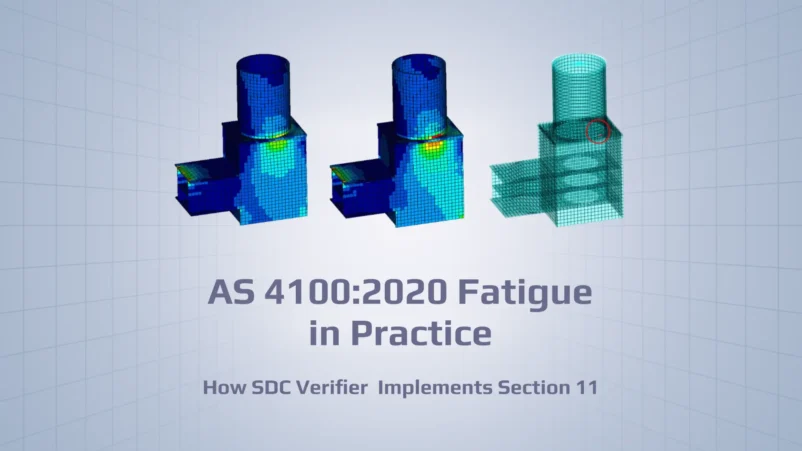
The Hot Spot Stress (HSS) method also called structural stress or geometric stress approach, is a technique used for evaluating the structural integrity of welded components in finite element analysis. It is commonly employed in the field of engineering to assess the fatigue performance of welded joints, focusing on identifying these critical locations of stress concentrations at the weld toe or weld root, known as “hot spots”, where fatigue damage is most likely to occur.
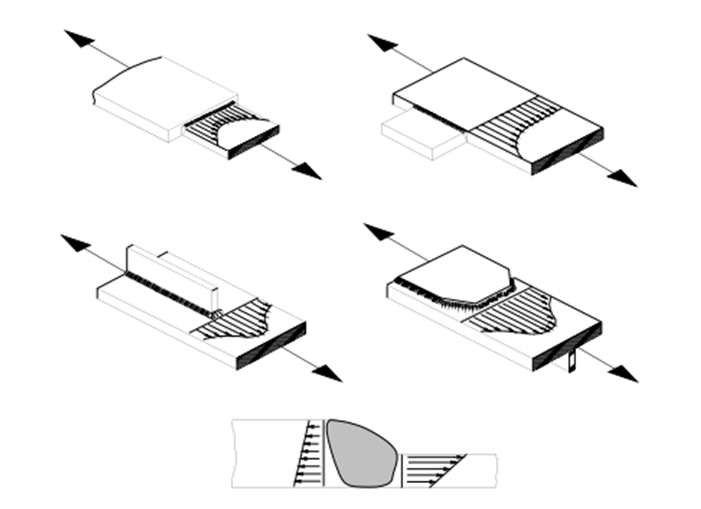
By focusing on the critical areas prone to stress concentration, the HSS method provides a more accurate evaluation of the fatigue performance of welded joints. It allows engineers to optimize the design, select appropriate materials, and determine the necessary weld details to enhance the durability and reliability of welded structures.
Types of Hot Spot Stress Method according to IIW Fatigue Recommendations
By default, reference point settings are based on International Institute of Welding (IIW) Fatigue Recommendations IIW-1823-07/XIII-2151r4-07/XV-1254r4-07 Dec. 2008. According to these regulations, the hot spot stress is described using two or three stress or strain values at particular reference points apart from the weld toe in direction of stress. There are several ways to identify critical points or hot spots, among them measuring several different points, analyzing the results of a prior FEM analysis, and experiencing existing components, which failed.
There are two different types of hot-spots, the so-called “a” and “b” types, which depend on the location of the critical point.
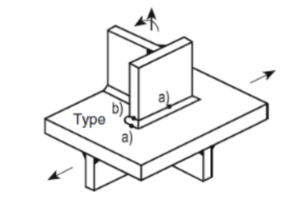
Type “a” can be determined as structural hot spot stress transverse to weld toe on plate surface. While, type “b” can be determined as structural hot spot stress transverse to weld toe at plate edge.
Hot spot stress usage in Industry Standards
The Hot Spot Stress (HSS) method is a commonly used FEA to determine the stress concentration factor at the weld toe. It is used in various industry standards for weld strength and weld fatigue, including:
- DIN 15018,
- DVS 1608 and DVS 1612,
- DNV-RP-C203 Fatigue,
- EN13001,
- Eurocode 3 Fatigue (EN1993-1-9, 2005),
- FEM 1.001 (3rd, 1998),
- FKM – Analytical strength assessment,
- DNV OS-C101-LRFD Weld Strength,
- DNV OS-C201-WSD Weld Strength,
- Eurocode 3 Weld Strength (EN1993-1-8, 2005).
Stresses for welds with these standards can be calculated both with nominal stress method and hot spot stress method. The choice of the methodology in each case depends on the engineering task and structure elements level of complexity and importance.
Implementation in SDC Verifier
Hot Spot Stress Analysis is available in the Enterprise version of SDC Verifier and can be used out of the box in a fatigue check such as ASME VIII (Div2, 2010) (Boiler and Pressure Vessel Code), DIN 15018 (1984) (Cranes. Steel structures. Verification and analyses), DVS 1608 (June 2010), DVS 1612 (August 2014), DNV OS-C101-LRFD Weld Strength (2011), DNV OS-C201-WSD Weld Strength (2011), DNV-RP-C203 Fatigue (2016), EN 13001 (2018) (Crane safety – General design), Eurocode3 Fatigue (EN 1993-1-9, 2005), FEM 1.001 (3rd, 1998) (Rules For The Design of Hoisting Appliances), FKM (5th, 2003), and FKM (6th, 2012).
The Weld Finder tool has a Hot Spot Stress tab where the engineer can set hot spot locations to interpolate stresses according to reference points to calculate Hot Spot stress and use the data in further fatigue calculations, custom formulas and checks.
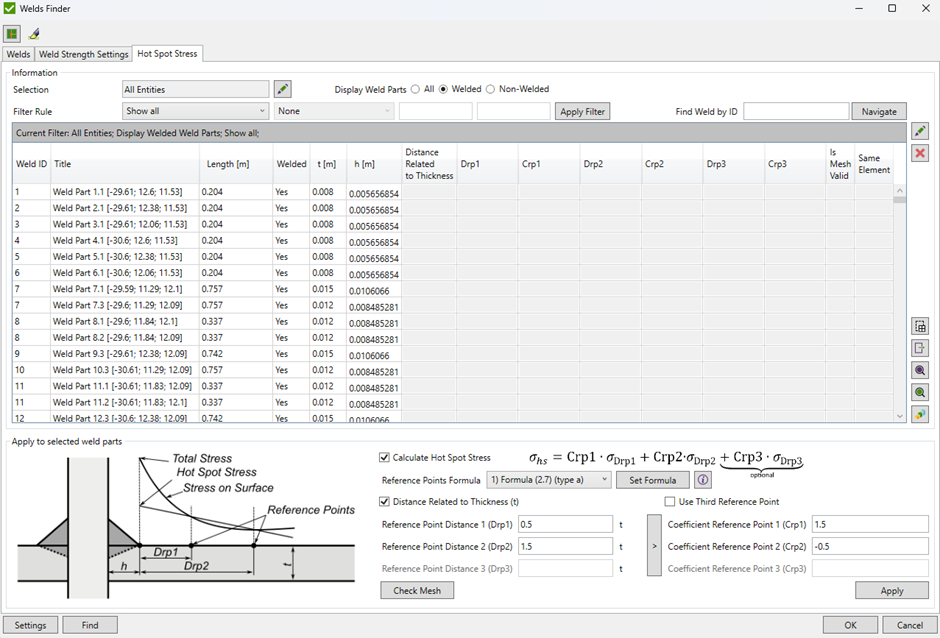
Hot spot stress is calculated using the formula and IIW fatigue recommendations. For correct stress interpolation, the reference points should not be on the same element and the first interpolation point should not be on the element of the welded part.
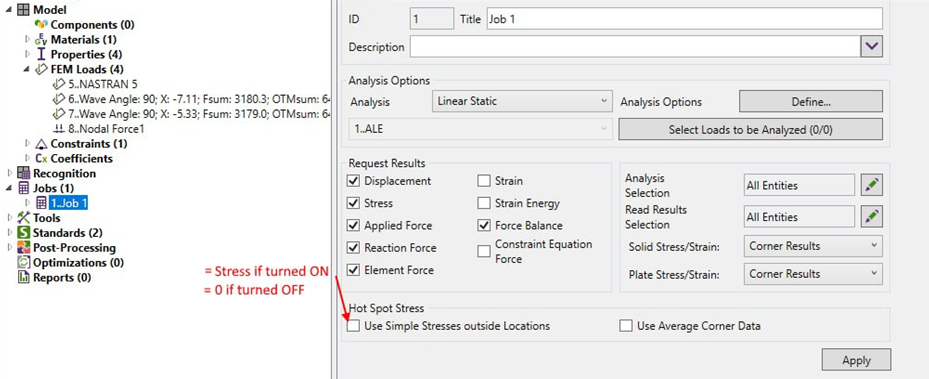
Beside the hot spot locations that are defined in the Weld Finder, each Job has additional settings that influence on hot spot stress result:
- Use Simple Stresses outside Locations – display simple stress values for all elements that are not used in hot spot locations defined in Weld Finder. Display 0 if turned off;
- Use Average Corner Data – use averaged top/bottom stresses from all attached elements at the element corner where hot spot is calculated.
In the formulas of the standard, it is possible to check if the element point of interest has hot spot location settings defined in Weld Finder by using Element.IsHotSpotCalculated (or Element.IsHotSpotCalculated[point number] for specific point of interest). For example, it is possible to choose whether to use the Hot Spot Stress or Weld Stress result if the hot spot location is not defined.

Conclusion
It is always recommended to refer to relevant design codes, standards, and guidelines specific to the application and industry being considered to ensure the welds meet the necessary safety and quality requirements. It’s important to note that the choice between the hot spot stress method and the nominal stress method depends on the specific application, the complexity of the structure, and the desired level of accuracy. In some cases, a combination of both methods may be employed to ensure comprehensive fatigue analysis.
In standards, it is recommended to use both these methods to allow analyzing more complex structures and connections, and obtaining more accurate results. Performing these analyze with FEA involves numerous time and effort consuming steps, and with SDC Verifier, all these procedures are automatized, saving engineers’ time for other non-routine tasks.
