Presentation Designer
Presentation designer allows to prepare a presentation of results, preview them and export to Microsoft Power Point. It is possible to create slides, customize layout and positions of items.
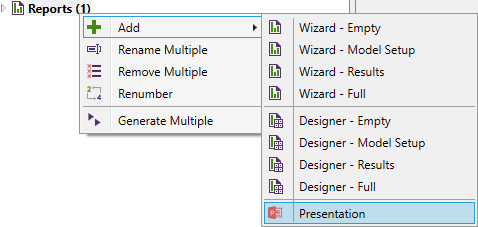
Press from the tree to launch Presentation Designer:
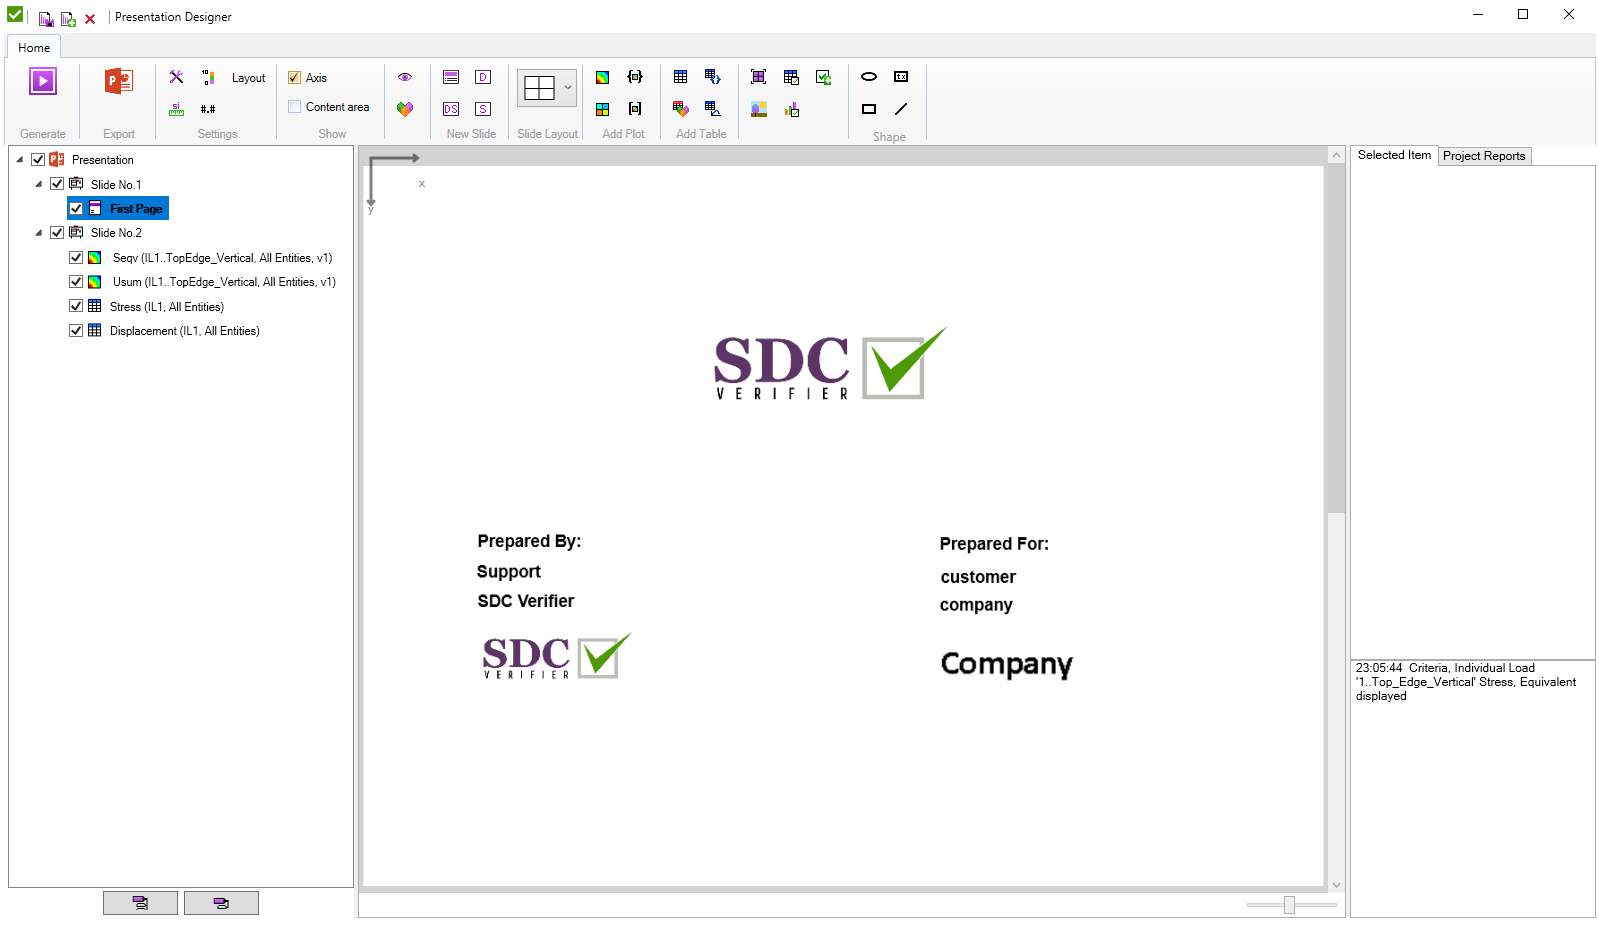
Presentation designer is divided into the following items:
1. Ribbon

 - save a report profile;
 - save a report profile with a different name;
 - close a presentation designer window;
 - generate a full presentation;
 - save a presentation in MS Power Point by the defined path.
Settings
 -
-  -
-  -
-  -
- - show an axis for X and Y coordinate of the slide;
- set the Layout settings;
- show all margins and a working area of the selected slide;
 - views manager;
 - components manager;
New Slide
![]() - add an empty slide;
- add an empty slide;
 - open a window to create tables or plots for the selected loads and option is selected;
 - open a window to create tables or plots for the selected loads and option is selected;
 - open a window to create tables or plots for the selected loads and option is selected.
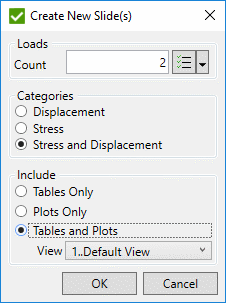
Select loads using Multiple Load Selector. Pick option and Include option from respective lists. Select View to be used in plots and press OK button. For each selected load separate slide will be created.
Slide layout
A Layout is a position of elements on the slide. Selected layout will be applied to each newly created slide.
Add Plot
 -
-  - add output vector criteria plot;
 -
-  - add an output vector contour plot.
Add Tables
 - add an expand/extreme table;
 - add a component extreme table (over selections);
 - add an flow table (over loads) table.
Other items
 - display a user defined selection with the defined View;
 - insert an image from a file;
 - open window to add new check tables:
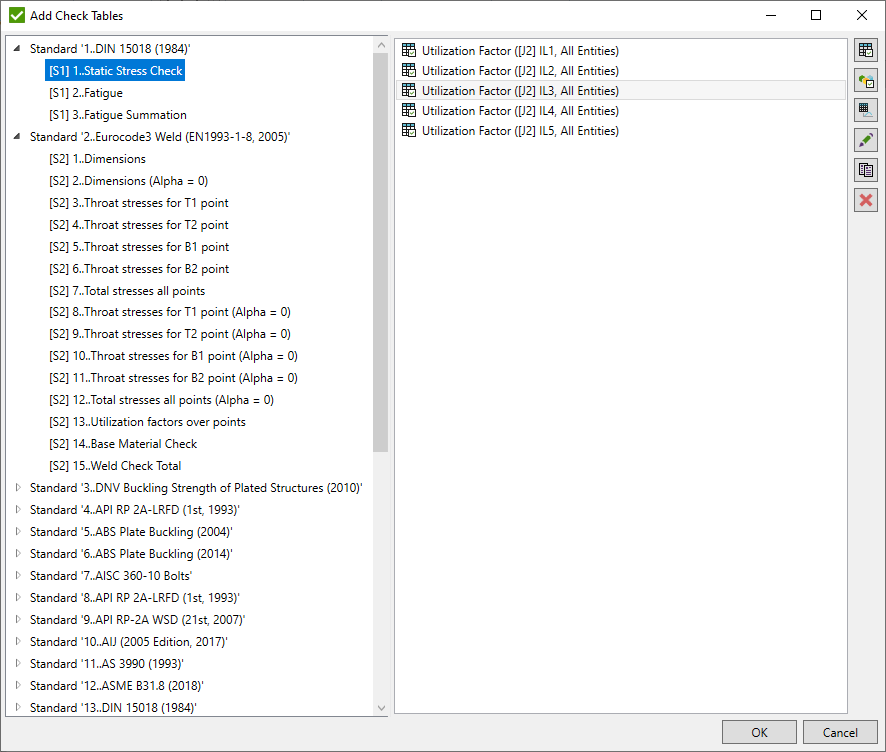
Select the standard and check from the respective lists to add tables. Depending on the check type (fatigue summation, plate buckling or custom) different windows will be opened:
 - add a check table;
 - add a check component table;
 - add a check flow expand table.
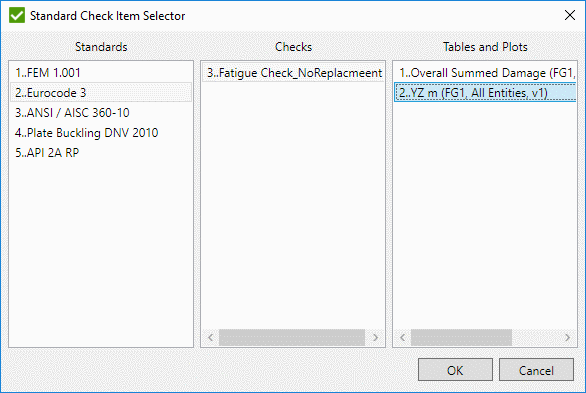
 - open window to add new check plots:

Select the standard and check from the respective lists to add plots. Depending on the check type (fatigue summation, plate buckling or custom) different windows will be opened:
 - add a criteria plot;
 - add a contour check plot;
 - add a beam member diagram.
Plots and tables will be added to the selected a slide.
It is possible to export already created in the project check plots and tables. Press to open window:
Select plots and tables to be imported and press button. Tables and plots will be added to the selected slide.
Shape
 - add an ellipse item to the current slide;
 - add a rectangle item to the current slide;
 - add a text item to the current slide.
Edit selected item
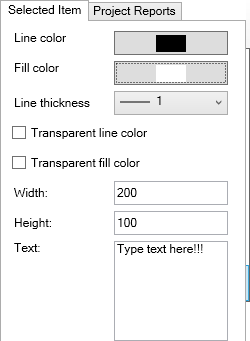
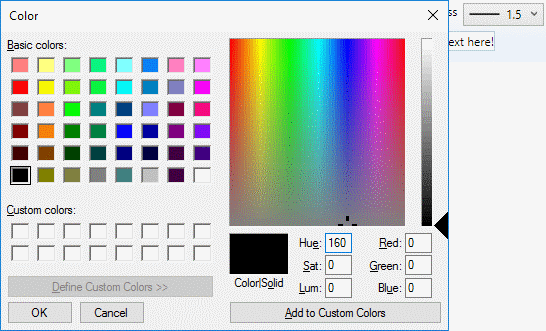
- select the color of the border;
- select the color to fill the item;
Colors selector
- use transparent color for the border line;
- use transparent color for the item body;
- the width of the item;
- the height of the item;
- the thickness of the border;
- type the text to be displayed inside of the rectangle. Available only for the text item;
 - add line item to current slide;
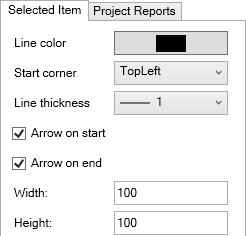
- select the color of the line;
- select the corner where the line starts (top left, bottom right etc.);
- the width of the line boundaries;
- the height of the line boundaries;
- the thickness of the line;
- draw an arrow on the start of the line;
- draw an arrow on the end of the line;
Note: It is possible to change the line slope by operating with the height and width values;
Slide
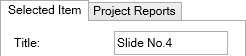
Set the title for the slide. Enabled only for the selected slide.
2. Report Content
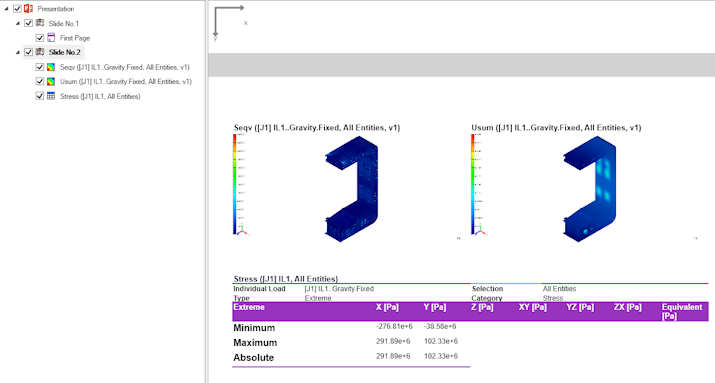
Each slide can contain tables, plots, shapes, text, model plot and custom image.
Note: Items position on the slide corresponds to the visibility of the item on the slide. The first item is on the top of all other. Change items order to move the item to the front or to the back.
item contains information about an engineer and customer details, company logos etc. To change the first page information press from the context menu:
First page settings window will be displayed:
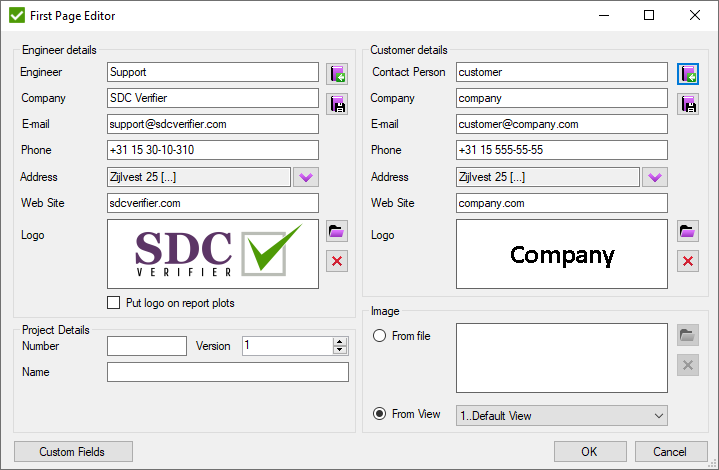
The first page has its own layout that can be modified in the Layout settings.
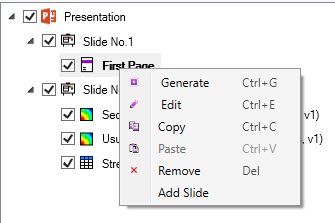
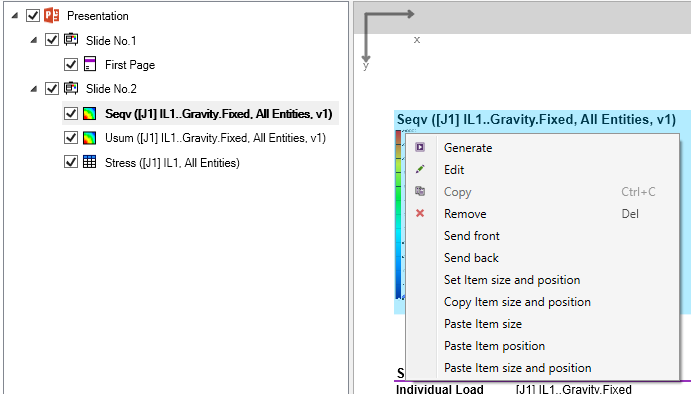
Item context menu commands.
 - generate current item and all subitems;
 - edit current item;
 - copy current item with all subitems;
 - paste copied item;
- remove current item and all subitems;
- add an empty slide to the structure;
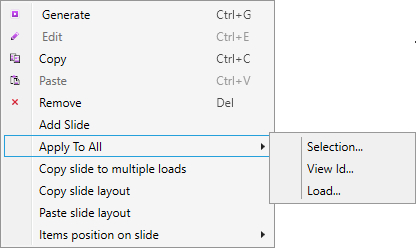
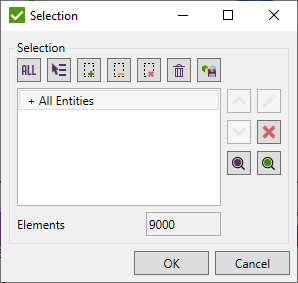
- change the selection for all tables and plots on the slide:
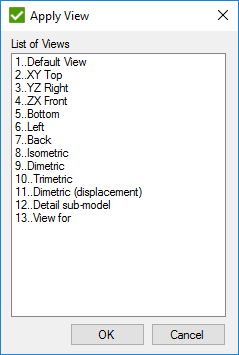
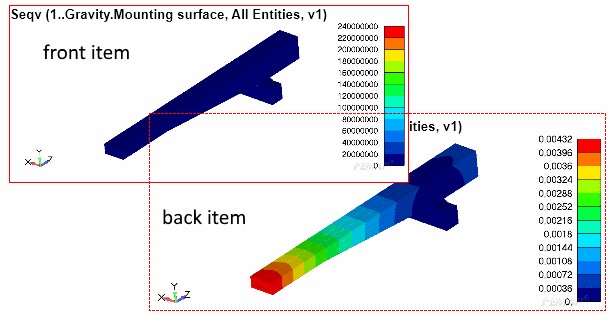
- change the view for plotting by selecting from the displayed list:
- change load for all tables (except the flow tables) and plots on the slide using Single Load Selector;
- multiply structure and layout of current slide to the selected loads using Multiple Load Selector;
Flow tables will be pasted with the original parameters.
- copy all locations and sizes of the items of current slide;
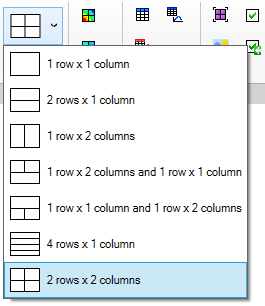
- set layout to the respective items positions;
- set layout to the respective items positions:
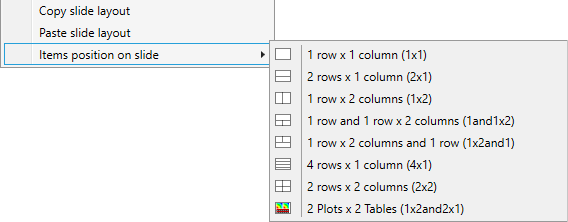
- 1 row x 1 column - one position on the slide. Such layout can be used for a detailed plot or a model setup general plot;
- 2 rows x 1 column - two positions on the slide. Can be used for a flow table results;
- 1 row x 2 columns - similar to previous option except items are narrower and longer;
- 1 row and 1 row x 2 columns - three positions per page. Can be used to create one plot and 2 extreme tables;
- 1 row x 2 columns and 1 row - similar as previous option except for the position of the wider item;
- 2 rows x 2 columns - 4 items per slide. Can be used to display 4 plots at one slide;
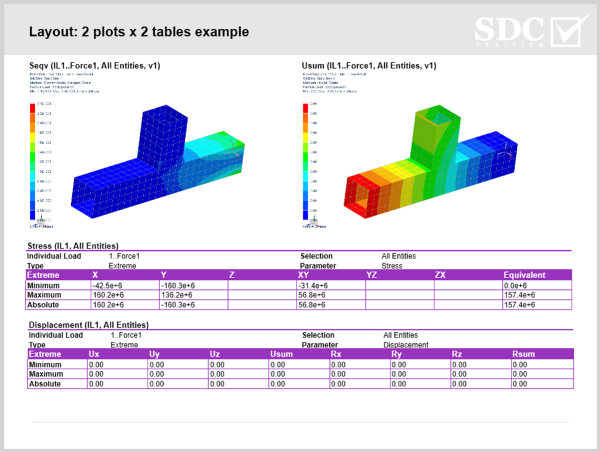
- 2 plots x 2 tables - special layout to place 2 plots next to each other and 2 extreme tables to one slide:
Content context menu commands.
It is possible to preview the location and size of the selected item on the slide. Hold right mouse click button and move the item to the necessary place. To change the size of the item, move the mouse to the bottom right corner and change the size manually:
- generate current item ;
- edit current item;
- copy current item;
- remove current item;
- change the overlaying of elements. The order of the items of the slide will be changed respectively.
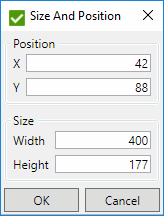
- open the window to set the item size and the position manually:
Note: Turn on the Axis option on the ribbon and X Y axes will be displayed on the top left corner of the slide.
- copy the item size and position to clipboard;
- set the size for the item from clipboard;
- set the position of the item from clipboard;
- set the size and the position for the item from the clipboard.
3. Predefined reports and message window:
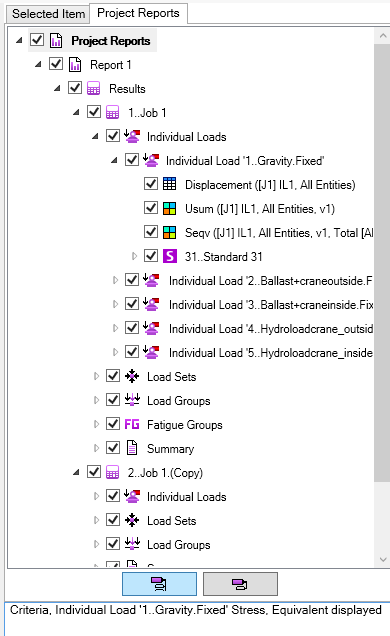
- already existing in the project report designers and presentation designers. It is possible to include all plots and tables from existing reports to current by moving the respective items.
In the , all actions of the program (results reading etc.) are displayed.
Presentation Layout
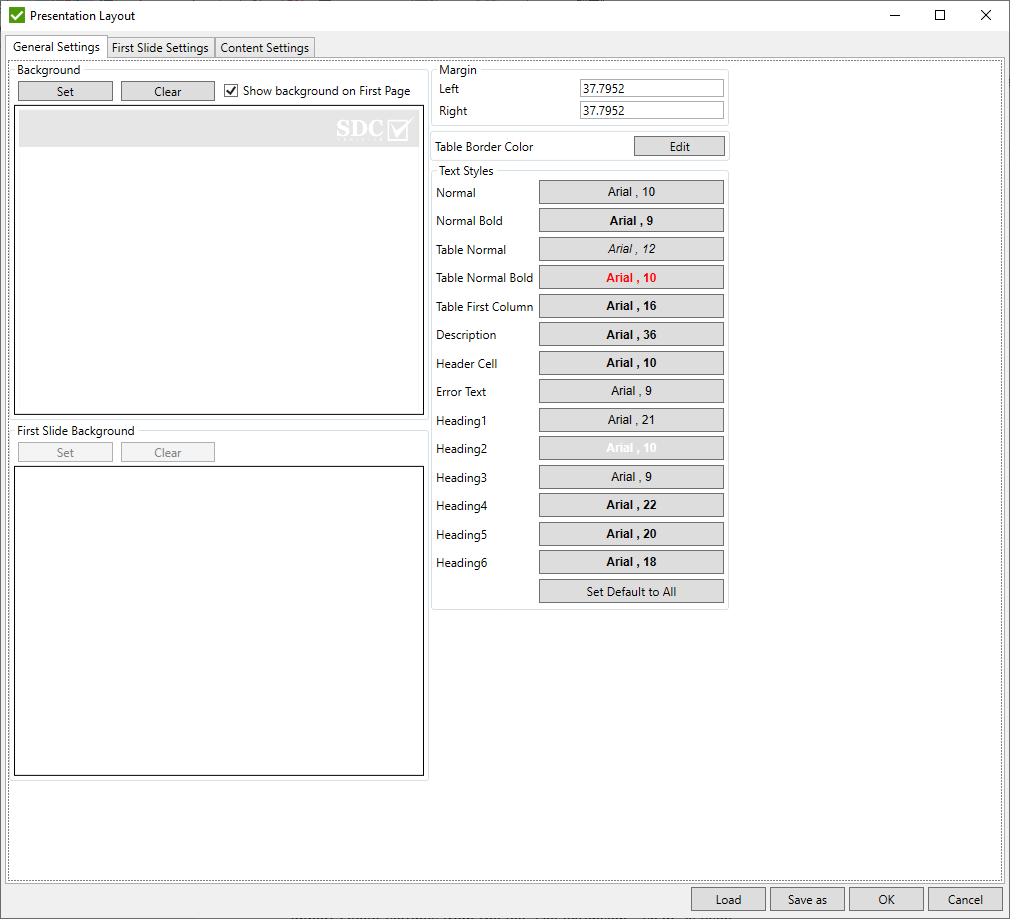
Layout is divided into three categories:- text styles, background image etc.;
- custom header, footer and content settings for the first page slide;
- custom header and footer settings for the rest slides;
Note: Layout settings are applied to all presentation designers not only in the current project.
It is possible to share layout settings between the different computers or keep few templates for different projects. Press button to export all settings to the file. Press to import layout settings from the file. File extension ".soap" is used.
General settings
- set the distance from the left/right side of the slide to the slide content.
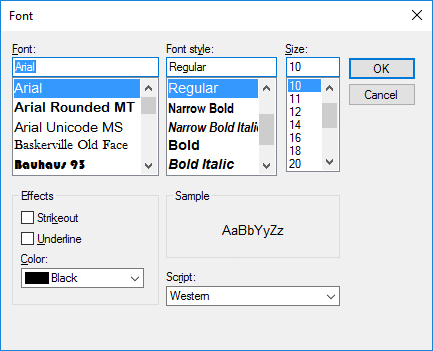
- define the text font for the predefined text styles. Press button opposite to necessary text style to change the font settings:
 - set the default font settings for each text style;
- set a custom color of the table borders;
- use a background image to be displayed on the slides. Press button to select an image from the file. Press button to clear the background image;
- use the same image for the first slide;
- set the different background image for the first slide;
First slide settings
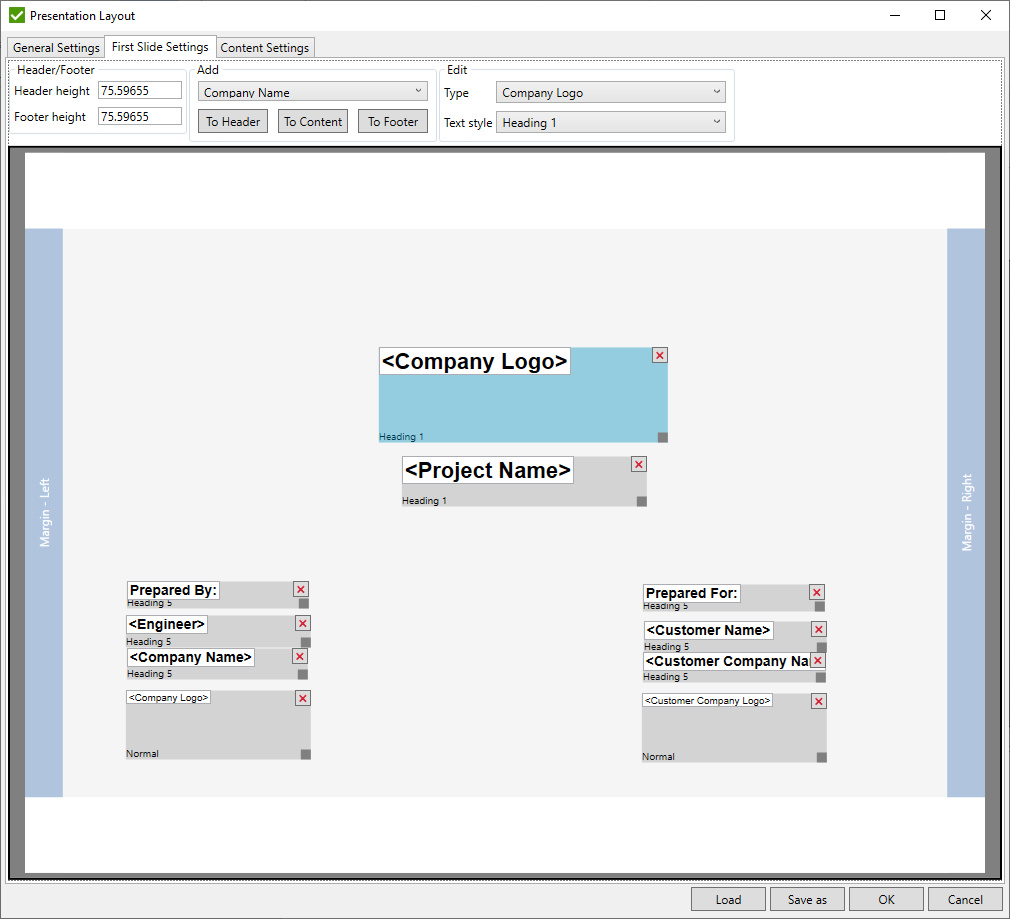
Note: The first slide settings are applied only to the first slide. For the rest slides the Content settings are used.
- set the distance from the top / bottom side of the slide to the slide content;
- select the item to be added (customer or engineer details, current date, text, project number etc.);
 - add the selected item to header;
 - add the selected item to content;
 - add selected item to footer.
- change the selected item type and the text style from the respective lists.
Generated first page

Content settings
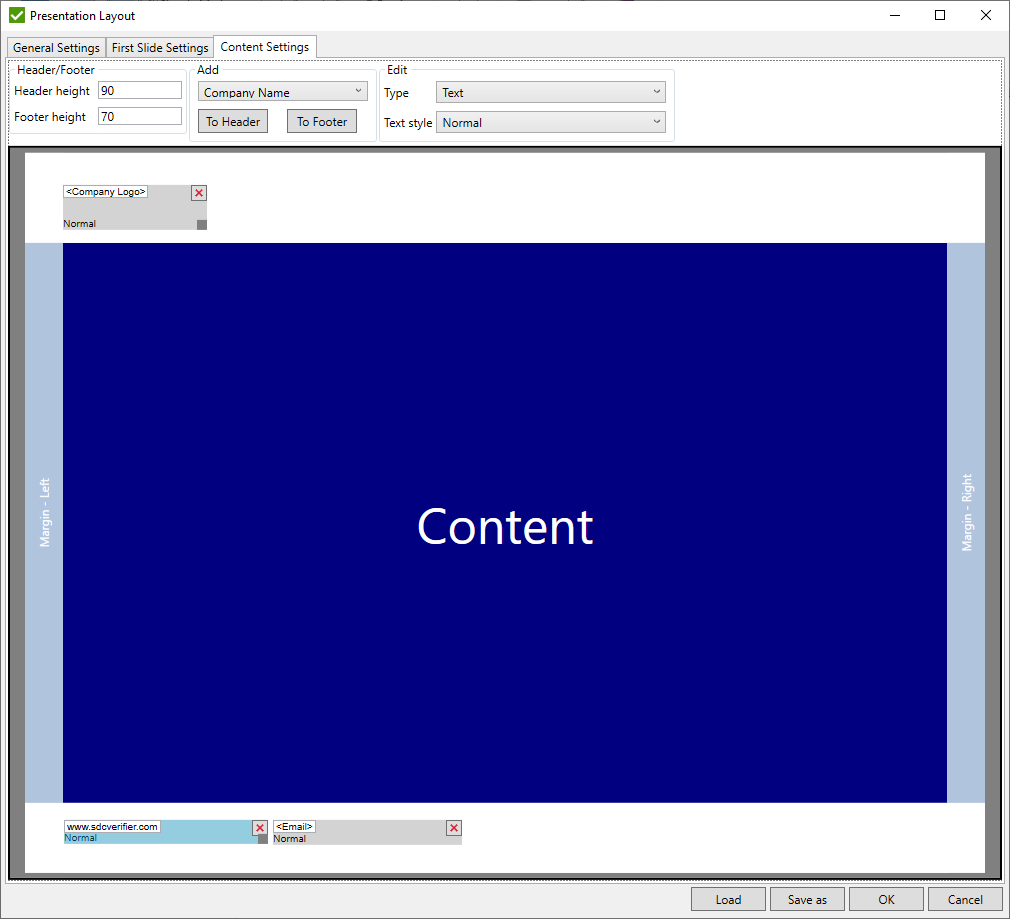
Content settings are similar to the First slide settings. The only difference is that it is not possible to add an item to the content but only to header and footer.